Bringing music back from the cloud
I was an early convert to having all my music in the cloud, so some years ago I uploaded all of my music library to what was then called Google Music, which had been ripped from CDs I purchased, to the cloud. Over the years I gravitated more to services like Spotify or Apple Music and left my music collection in Google alone and didn’t use it. Recently I’ve become somewhat tired of subscription services so I thought about repatriating my music from Google to my local storage.
What did I need to bring my music back from the cloud?
-
Download music from Google, that I uploaded all those years ago
-
Enough local storage to hold all of my music
-
Something to store, organise and play my music
- That something needed to be able to play music on my phone, my laptop and my desktop
Download music from Google
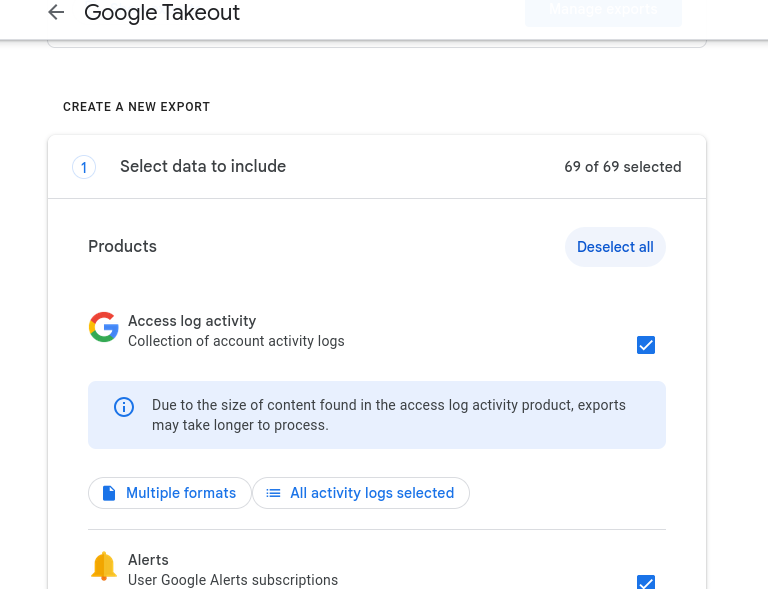
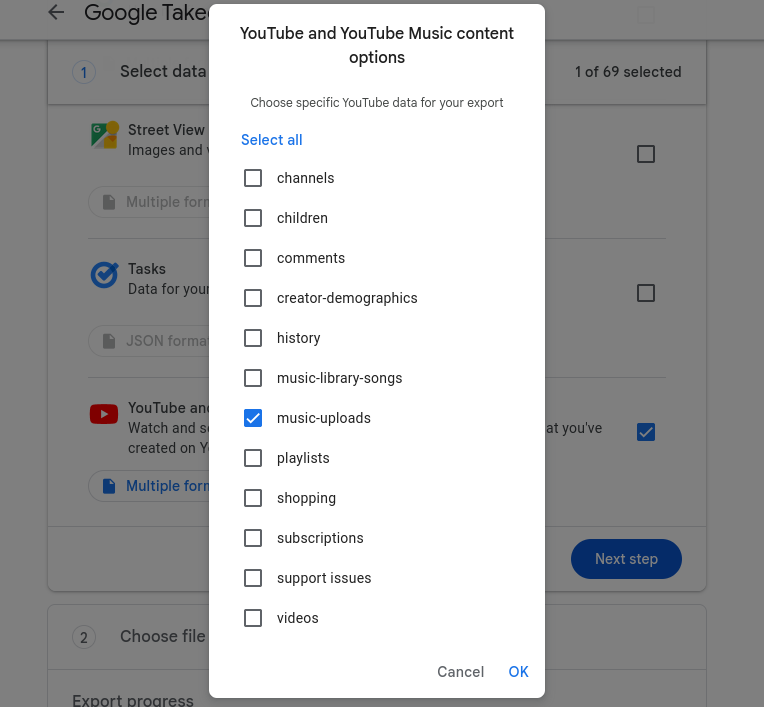
To download your music from Google head over to https://takeout.google.com/settings/takeout , by default all options are selected so you want to choose ‘deselect all’  and then scroll down to ‘Youtube and Youtube Music’, again choose ‘deslect all’ and choose ‘music-uploads’
  . You can then choose the format you want to download your music in, I chose ‘zip’ and then click ‘next step’. You can then choose how you want to download your music, I chose to have Google email me a link to download the music. You can then click ‘create export’ and Google will create a zip file of your music and email you a link to download it
Local Storage
Once you have your music downloaded you can then extract it to your local storage. I chose to extract my music to a folder called ‘Music’ in my home directory. I have enough storage attached to a mini PC that runs Pop OS, so storing the music locally wasn’t a problem.
Store, organise and play my music
I decided to use Jellyfin to store, organise and play my music. Jellyfin has a server component that runs on the mini PC and a client that runs on my phone, laptop and desktop. I installed Jellyfin on the mini PC and pointed it at the folder where I had downloaded my music from Google. Jellyfin then scanned the folder and added all of the music to its library. I then installed the Jellyfin client on my phone, laptop and desktop and pointed them at the Jellyfin server running on the mini PC.
Problems & Resolutions
The above all worked great, but I didn’t have any albums listed in Jellyfin. Jellyfin expects a certain directory structure https://jellyfin.org/docs/general/server/media/music I didn’t have that structure because when you download your music from Google it’s all in one folder, with no organisation whatsoever. A large amount of the music was also missing metadata, artist, album, song etc etc. This may have been a mistake when I uploaded a long time ago, or maybe Google did something. I don’t know. I needed to organise my music and add metadata to it. Enter MusicBrainz Picard https://picard.musicbrainz.org/ . MusicBrainz Picard is a music tagger that takes your music and adds metadata to it. You can then use the metadata to organise your music into the directory structure that Jellyfin expects. I installed MusicBrainz Picard on my laptop and pointed it at the folder where I had downloaded my music from Google. MusicBrainz Picard then scanned the folder and added metadata to all of the music. I then used MusicBrainz Picard to organise my music into the directory structure that Jellyfin expects. I then copied the organised music to the folder that Jellyfin was pointing at and Jellyfin then scanned the folder and added all of the music to its library. I then installed the Jellyfin client on my phone, laptop and desktop and pointed them at the Jellyfin server running on the mini PC.
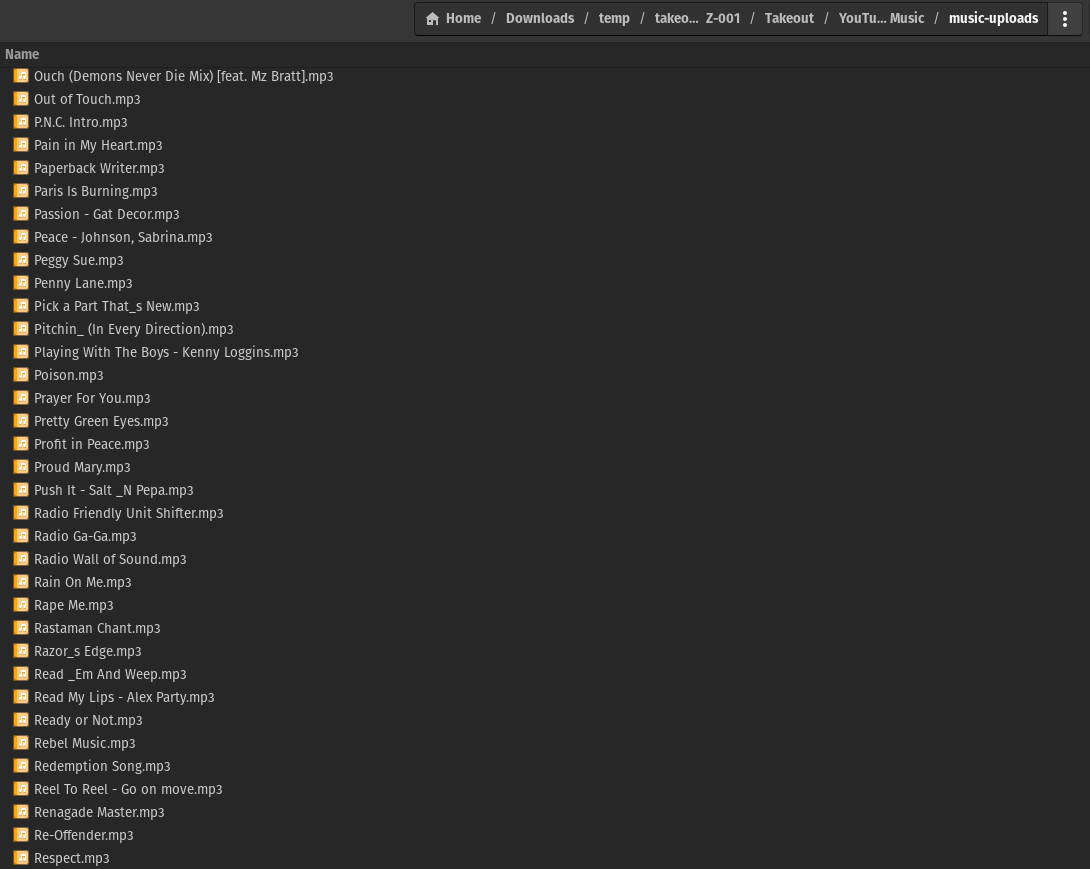
This is what the music looks like when you extract from the Google takeout zip file, all in one flat folder structure

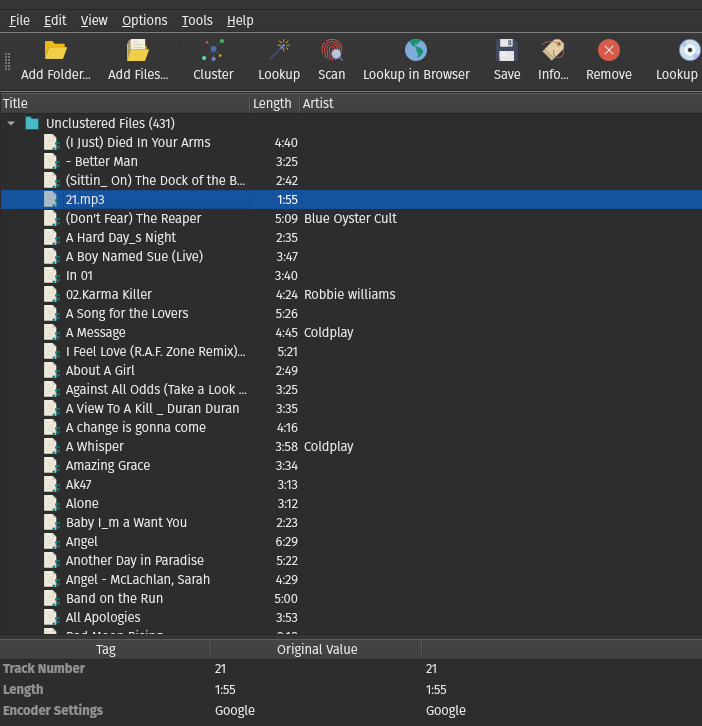
What the music looks like in in MusicBrainz Picard before the metadata is added and sorted into folders. Upon opening MusicBrainz Picard, click add folder and select the folder you extracted your music to.

Select all the songs in the list and choose ‘lookup’ from the menu on the left. MusicBrainz Picard will then look up the metadata for all of the songs and add it to the list. It can take some time to do this, depending on how many songs you have. When it is complete you should see something like this:

Select ‘save’ and the all the selected songs will be updated with the fresh metadata.
The final thing to work out is the folder structure, as mentioned earlier Jellyfin wants a specific structure. Once again MusixBrainz Picard can help here. Again select all the songs and from the menu choose ‘options - select file naming script - Preset 2:[album artist]/album/track/.title’ Click save again and MusicBrainz Picard will organise your music into the folder structure that Jellyfin expects. You can then copy the music to the folder that Jellyfin is pointing at and Jellyfin will scan the folder and add all of the music to its library.
Couple of notes on Jellyfin:
-
For installation follow the instructions here https://jellyfin.org/docs/general/administration/installing.html
-
For the client installation follow the instructions here https://jellyfin.org/docs/general/clients/index.html
-
On Linux, Jellyfin won’t have access to your /home/yourusername/Music folder. I created a a directory called Music in /mnt/media and copied my music there. Jellfin can access that fokder and scan it for music.
-
I have a two step process to rip music from CD to my Jellyfin library: I rip music using Sound Juicer to my /home/username/Music folder and then copy it from there to /mnt/media/music